
SaunaFin 's Ultimate Guide on How to Build a Sauna Kit
Posted on 08 July 2019
You might the love idea of building a sauna on your own, but the question is, do you know how to build a sauna kit? While DIY projects like assembling your own sauna can seem exciting, there are many pieces to the job that you need to consider before diving in and building your own sauna. First off, you need to figure out some basic details—where you want to put it, what you’re going to do with it (is it for use with family, friends or both?), and what type of sauna you want. Once you have made these important decisions, you can go ahead and start building your sauna. This guide will provide you with the essential DIY assembly information so your sauna can be put together effectively and efficiently.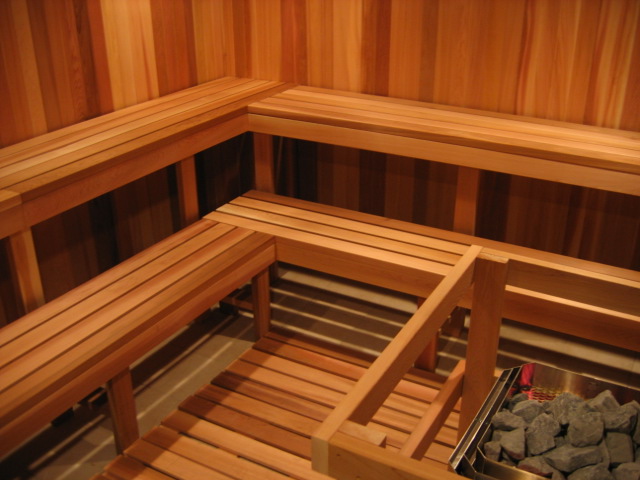
Once you’ve decided which type of sauna is best for you, you can use this guide to help you build it. This guide includes step-by-step instructions that are imperative for every do-it-yourselfer. Without a proper guide, you can really suffer the consequences of getting stuck or making a mistake you’ll regret. This guide will ensure that you do everything properly and end up with exactly what you want - a sauna that you can thoroughly enjoy for many years to come.
How to Build a Sauna Kit: Required Materials
Before starting the assembly, make sure that you have all the tools and materials needed. While we will supply integral parts of the sauna, you will need to ensure to have any additional framing, strapping, and wiring materials.
Materials You Supply
- Framing - In order to frame the walls and ceiling, use 2 x 4 construction grade studs. In case the ceiling span is over 10’, 2 x 6 studs should be used. For saunas 8’ x 8’ or under, the walls should be framed vertically and lined horizontally. After framing the walls at 16’’ on center, strap or frame the ceiling to an inside height of 82½’’.. Don’t forget to provide additional blocking for heater and bench supports.
- Strapping - Standard horizontal lining does not require strapping. For vertical lining, strap over the foil in order to change direction.
- Wiring - At this point, electrical rough-in of control, light, and heater should be completed. In case you are using an outside control, the thermostat should be installed at this time. Hook-up of the light and heater can be completed after the sauna is built.
- Insulation - The space between the studs in the ceiling and walls should be filled with 3½’’, R-12 fiberglass insulation.
Sauna Materials We Supply
- Vapour Barrier - We will supply the foil vapour barrier to be placed over insulation over the inside edge face of studs.
- Lining - For lining, you need to use the specified lengths of groove cedar and tongue. You may be required to trim these boards, depending on the actual inside size of your sauna. Use 1½’’ nails supplied or a nail gun and nail through the tongue to conceal all nail heads. Most install the cedar to the ceiling first. Then, start lining the walls, starting from ½’’ above the floor and then working your way up. The last board should be cut to fit.
- Fasteners - We supply galvanized nails along with treated deck screws. All of the fastening should be blind nailed.
- Benches - The sizes and the bench materials supplied will depend on the type of material kit selected. Depending on the bench style, there will be either 1x4 or 2x4 clear cedar boards for construction of the bench top. It may be necessary to trim these boards, depending on the inside size of the finished sauna. Prior to doing fastening, select the boards to ensure that the “better” face of the board will come out on the sitting surface. Use the supplied nails and screws to construct the benches. The depth of the bench will depend on the sauna size. If the sauna is over 5’ deep, the bottom bench should be 16’’ deep, and the top bench should be 20’’ deep. For a 4’ deep sauna, the benches will be 8’’ and 20’’ deep respectively. Leave 9/16’’ spacing between the bench boards. It is important to have two level benches, as the warm air rises up to the ceiling. You will not feel all the heat if you sit at a lower level.
- Door - The supplied door will either be cedar framed with 16’’ x 64’’ glass or made of solid cedar, with a smaller 12’’ x 24’’ window. The standard door size is 24’’ x 74’’, with a standard rough opening of 26’’ x 76½’’. All of the doors will already by pre-hung on 9/16’’ x 4-9/16’’ jamb. Different-size doors, frameless glass doors, and custom doors are available. It is important that the sauna door will open outward.
- Heater - You will receive either a Sauna Craft CW heater, which could be mounted either in the corner or on a straight wall, or a Tylo sauna heater, which can only be mounted on a straight wall.
- Heater Guard - Use 1 x 3 for the horizontal rails and 2 x 2 for the vertical posits. Tylo heaters may not require a guard due to their “cool-touch” shells.
- Cedar Floor (optional) - For the floor, use 1 x 4 cedar boards, with square edge laid over the sleepers. Place the sleepers at 1’-0’’ on centre. Place top boards about â…’’ apart.
Additional Considerations
- Drainage - For commercial saunas, a drain in the centre of the floor is required to facilitate cleaning. For residential saunas, tile is recommended, but not essential. Water should be used in moderation.
- Tile - For residential saunas, tile is functional and attractive, but simply leaving concrete is also acceptable.
Our Final Thoughts on Building a Sauna Kit
We hope that you have properly built the sauna of your dreams after reading this guide. However, if you require further help, please contact us and we will provide you with everything you need to properly build your sauna. We are experts on saunas and sauna kits and we are here to ensure you are 100% successful and fully satisfied. You can trust us to help you with all of your assembly needs so you can enjoy your new sauna for years to come. For more information, call us toll free at (800) 387-7029 or visit https://www.saunafin.com/contact to fill out a contact form.

